


Intro to Gardening: Building the Beds
Let's talk about what to do with all that sweet dirt you've dug up.

So we’ve planned out our spaces, we’ve got a boat-load of compost or at least other organic matter in a pile (leaves, sticks, logs, food scraps, manure, etc.) and now it’s time to do something useful with it all. So let’s talk today about the different kinds of ways you can plant some crops and feed the commune. We’ll also dig a little more into why this step matters so much. So for today, lets discuss three methods of planting:
Method 1: The Compost Lasagna.
This method, also known as no-till growing, Ruth Stout Method (which while not exactly the same, is close enough to drop in here because it uses the same principles)., or any number of other things is pretty simple. You take a flat chunk of land and layer cardboard (without any tape or other non-biodegradables attached), water, and compost until you have a pile that is roughly 6-10 inches deep depending on preference. Here’s a lazy MS paint illustration:
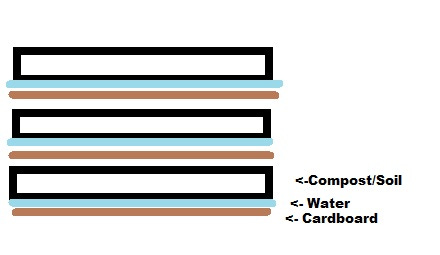
The thing is here, some folks who market garden professionally, will put down weed fabric, or tarp, or some other random shit under the compost to prevent weeds from sprouting in the garden space. However, that’s both 1) not Eco-freindly as those things don’t decompose well and are usually made of plastic, and 2) Cardboard does the exact same thing as weed fabric, but also becomes soil over time. The thing with weed prevention is that you have to prevent the weeds from having access to both moisture and sunlight. It’s OK if they get one or the other (in our case, the seeds will have plenty of moisture, but because they are buried under 8” of stuff, there isn’t any sun getting to them. Which is also why you put down multiple layers. A layer of cardboard, along with 2-3” of soil, followed by another layer of cardboard -soaked, then more soil, etc.
In the image the “layer of water” is really just properly soaking the cardboard to help it decay faster. Here’s what those look like not in MS paint:
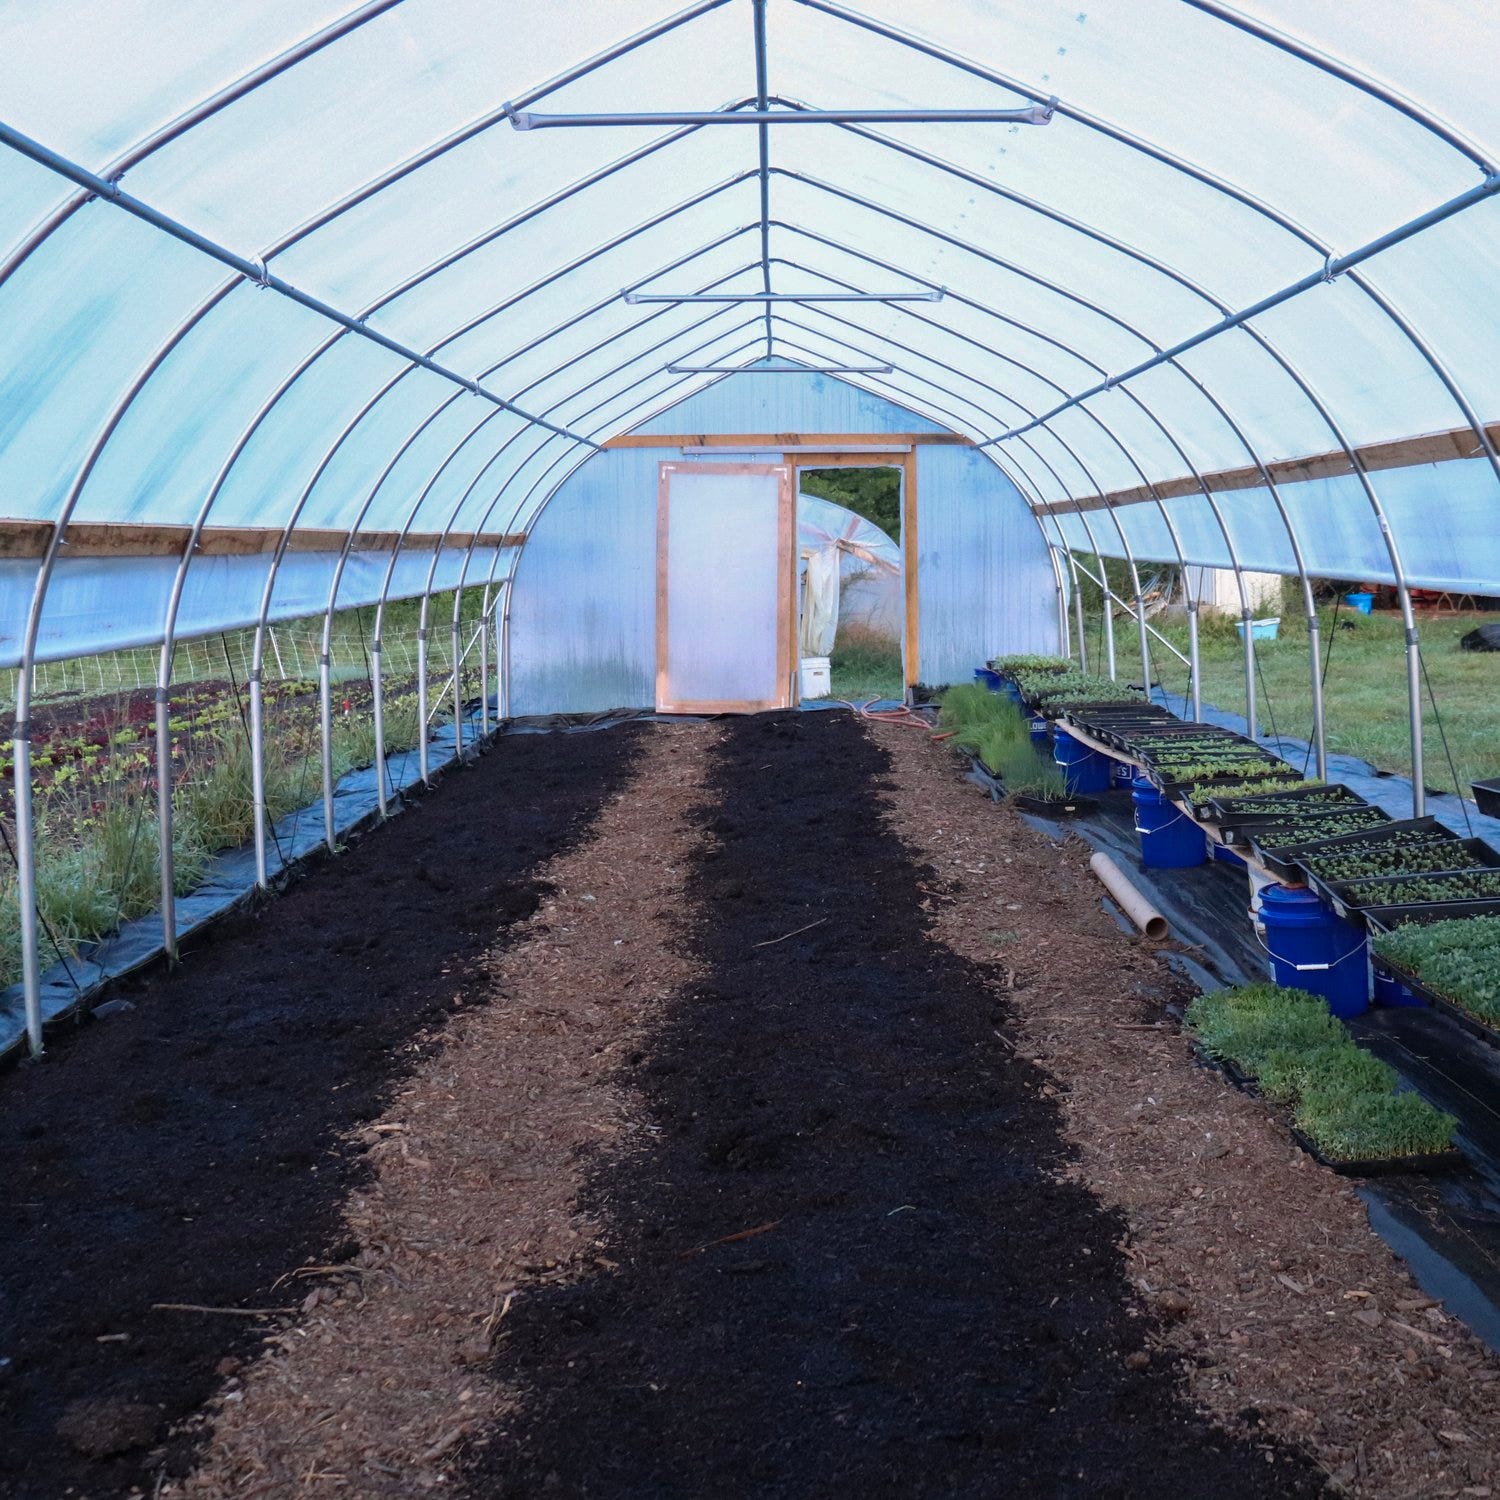
The above shot, from No Till Growers, uses wood chips/mulch in between each bed to 1) mark off where food goes vs where you walk to harvest it, 2) help build the under-soil because the mulch breaks down over time as well, 3) aid in water retention in the under-soil, meaning you don’t have to water as much, and 4) is aesthetically pleasing.
You can see in the above image the standard system for this kind of no-till system is a series of 50’ long beds that are about 2’ wide, with around 18-24” of space in between each bed. This gives you plenty of room to walk without accidentally stepping on any plants, the 2’ beds means that you can reach across from either side to harvest without it being too backbreaking, and 50’ long beds means you’re growing a shitload of food. The lasagna system can be done either under a high tunnel (as seen above) or just out in the open. The primary difference being that the high tunnels will often allow you to also grow food during the winter months as the greenhouse like conditions prevent hard frost from killing your produce.
Here’s what they look like without covering. This particular project which is called Raleigh City Farms uses a single acre inside of Raleigh. NC to grow a ridiculous amount of food, thanks in part to the planning and design of Josh Satin1. So you can see how planning your space (as in the earlier article) can lead to quite the production:
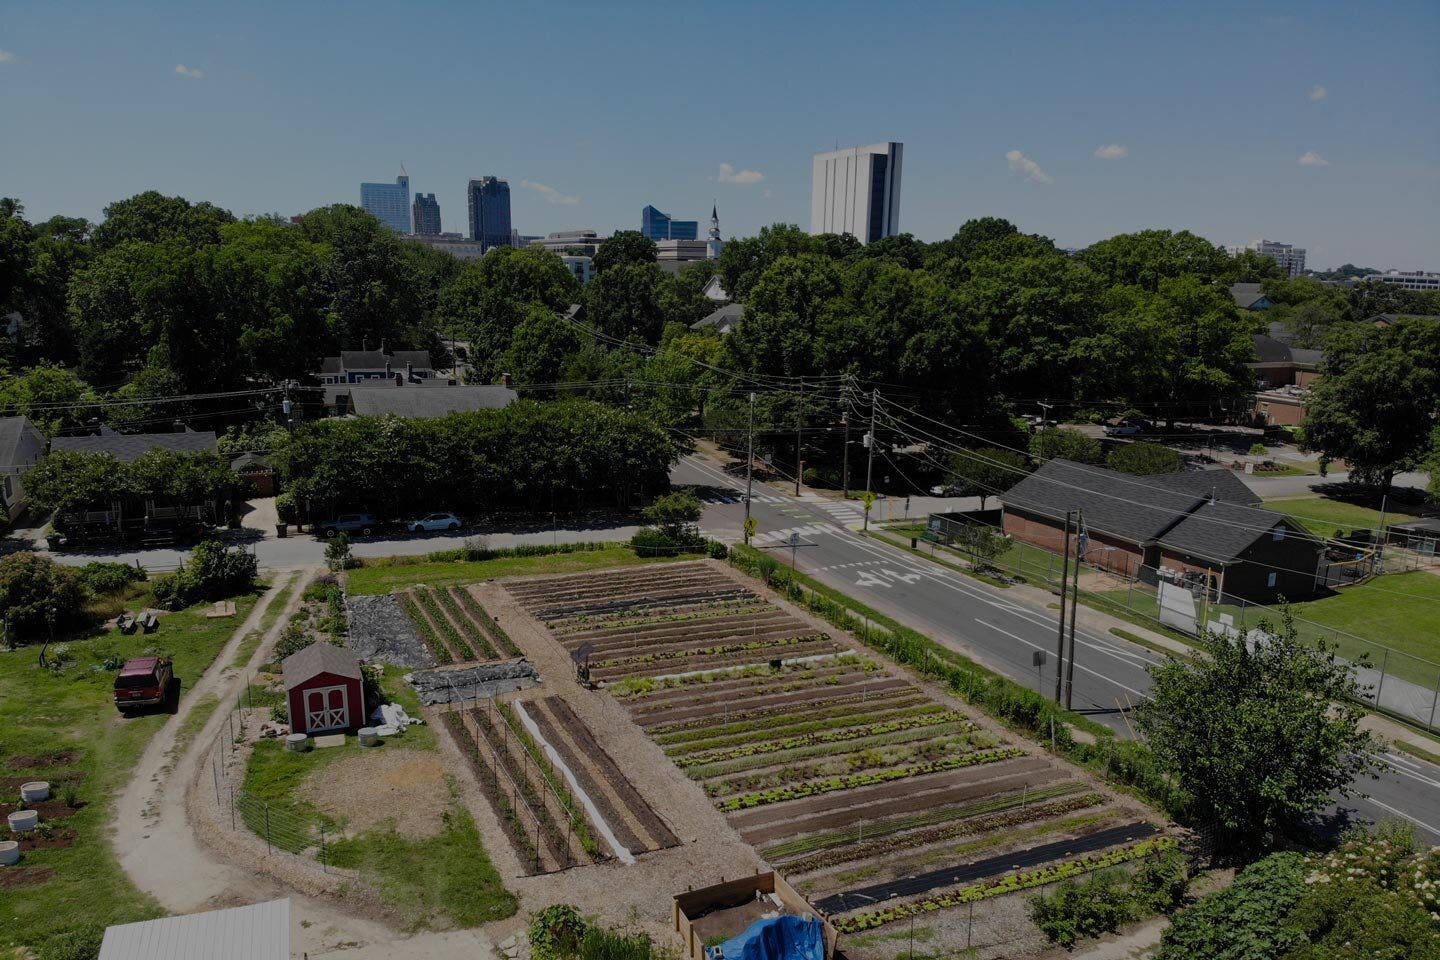
As you can see above, there are approximately 45 50’beds each with a different crop. This photo is a little older and the current layout has the back grassy area filled with about 40 berry bushes, and a few of the beds sitting under some high tunnels. There is also a pretty large compost system behind the shed and an 8’x10’ shed to house all the tools. A set up like this can easily generate ~250K annually in revenue to local restaurants/grocers, or can feed dozens of people in perpetuity.
So if you’re looking at buying land for a commune, committing 1 acre to this, and 1-2 acres2 for housing, you can sustain a solid community of 100 people forever.
Method 2: Raised Beds, common, cheap, effective af.
The typical method by which most hobby gardeners or folks in suburban areas grow plants is inside raised beds. These are pretty much what they sound like,a walled in area, filled with soil and segregated from the rest of the yard.
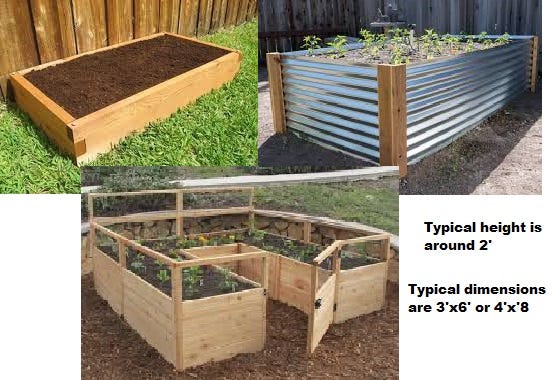
Raised beds can be simple or complex, wood or metal, or even cinder block. There’s a hundred places you can look online to find plans for constructing them. I personally recommend the one at Growfully3. It’s an excellent design, should last a few decades (which makes it worth the higher cost compared to lasagna beds) and comes with the benefits of not having to bend over to work the garden. It’s an excellent option for people who are disabled, or for whatever reason, can’t do a lot of repeated bending/kneeling/standing.
As for the insides of the beds, you have two ways to go about it, one which is more expensive, is to fill it with soil. So a compost/garden soil mix, or compost/sand mix, to help drainage, etc. Like the lasagna beds, I recommend placing cardboard under your beds, unless you just buy/get used horse/cattle troughs which come with a bottom. It will help control weeds, and if you happen to have things like moles, chipmunks, etc in your area, a layer of wire mesh under the cardboard will prevent critters from digging up into your beds and eating your food.
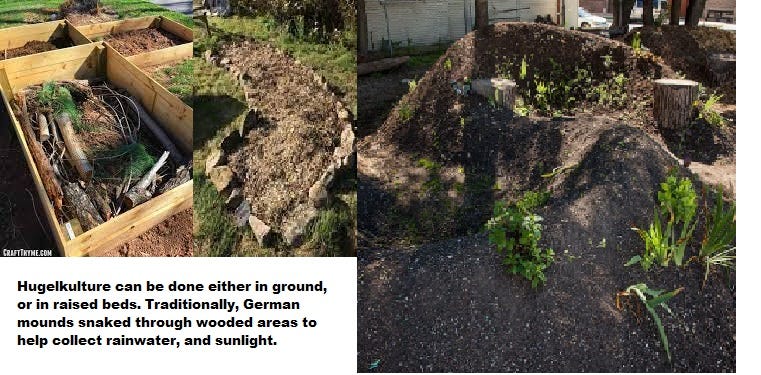
The less expensive way is to combine the raised beds with method 3, which is called Hugelkulture. We’ll cover that more in a second, but the breakdown is that this method is much cheaper, and much more sustainable for long term growing.
Method 3: Hugelkulture: Mound ya business!
The jokes are for me. The knowledge is for you!
Hugelkulture is a old Germanic growing method and the word translates into Mound Culture, and is a system by which soil is piled over the top of woody debris and your garden is planted into the side and top of the mound. The method is labor intensive on the front end, but allows for almost no work requirements after the initial labor. A large trench is dug 2-3’ deep in the ground. New wood, or fresh large logs from a felled tree are layered across the bottom, then on top of those go, large branches, sticks, leafs and grass clippings, and finally compost. The final product is usually around 4-5’ tall which seems daunting, but with organic decay, you lose about 15-20% of the mound size each year. Basically, you end up with something akin to:

In a real world setting you get something akin to these:
There are a ton of benefits to this method, the woody debris soaks up water like a sponge slowly releasing it back into the ground when the roots call for it. Which means if you live in a climate that doesn’t get a lot of rain, this is quite helpful. The other benefit is that the mound breaks down slowly over time, releasing more nutrients back into the soil meaning if you dumped enough of the right stuff in initially, you won’t have to keep adding amendments to the soil over time.
What that means, is you can plant a number of perennial plants into the mound, and simply let them grow and thrive over time. After about 5-7 years when the mound is depleted, you can simply just add minor amendments as needed to maintain that space. Generally, these are used in a more permaculture setting, which means the perennial plants that are grown for food, also have a number of plants what are grown simply to be cut down and added into the soil over time. For a good resource on building a permaculture garden, or system I suggest James Prigioni’s YouTube Channel. I set that link to the permaculture search so you can simply click through those videos.
For additional reference on why this system is preferable if you have the time and energy, it’s literally how the Paiute Ahwahnechee4 people managed the Yosemite valley for generations. Prior to being stumbled into by white folks, the land that is now Yosemite National Park, was basically a massive food forest. Fun fact: So is the Amazon. Look it up.
Wrap-up: What methods should you use?
To be completely honest: All of them. Any of my gardens will usually have a combination of raised beds and Hugel beds. I don’t do in ground stuff because I have two dogs who like to dig, and I would never get to harvest anything if I did.
A lot of the planning is going to come down to a few things:
Access to space - The more space you have, the easier to do in ground lasagna beds, or large scale Hugelkulture mounds.
Access to tools - Huhelkulture requires some heavy duty digging/trenching, and raised beds require assembly. So things like drills, saws, etc.
Access to capability - Some of the methods are WAY more labor intensive than others, and if you or some of your people aren’t able to do a ton of manual labor, then digging hugelkulture beds may not be an option. That said, I suggest reading about Ruth Stout and her method of what she calls lazy gardening. She revolutionized how people fed themselves in the early-mid 20th century.
I think that should cover it for this one. If you couple this with some of the other articles I’ve written and all the links inside them. You should be well on your way to planting some food and doin a heckin revolt yah? Next time I will probably wrap up the gardening tidbits for a bit with some discussion on watering methods, planting strategies, etc to help ensure maximized harvests for you and yours. Stay Safe out there!
-EQ
https://www.youtube.com/channel/UCHynVrKVZtTXf3hndd2ZR4A
An acre is 40,000 Sq feet. So for reference, a reasonable 3 bedroom, 2 bathroom home which is around 1,500 sq ft as well as a small yard for personal gardens/play (combined total 3,000 Sq ft) can have around 12 homes on an acre. With each house having an average family of 4, you are looking at around 96 people easily fit within 2 acres.
https://growfully.com/raised-beds-tutorial-plans/